






# Thread Milling Macro for YOU: Simplify Your CNC Threading Operations
Thread milling is one of those CNC operations that can feel intimidating — especially when you’re writing the code from scratch. Between calculating helical interpolation paths, managing proper lead values, and ensuring your tool compensation is dialed in, it’s easy to see why many machinists either avoid thread milling or rely heavily on CAM software to generate the toolpaths.
But what if you had a ready-to-use macro that could handle the heavy lifting for you?
In a recent video from **Donnie Hinske**, he shares a thread milling macro designed to make your life in the shop significantly easier. Whether you’re a seasoned CNC programmer or someone just getting comfortable with G-code, this is the kind of resource that can save you hours of programming time and reduce the risk of costly mistakes.
## What Is Thread Milling?
Before we dive into the macro itself, let’s quickly cover what thread milling actually is and why it’s such a valuable technique in CNC machining.
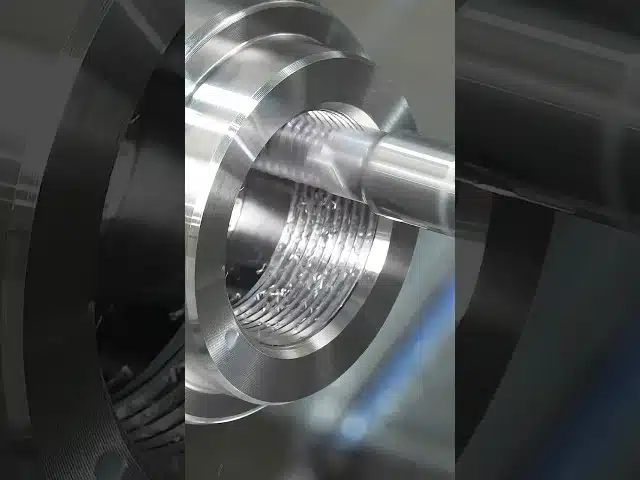
Thread milling is a method of cutting internal or external threads using a CNC milling machine. Unlike tapping, which uses a single-point or multi-point tap rotating in sync with the feed rate, thread milling uses a rotating cutter that follows a helical interpolation path (typically using G2 or G3 circular interpolation combined with a Z-axis movement).
### Advantages of Thread Milling Over Tapping:
– **Versatility**: A single thread mill can cut multiple thread sizes (as long as the pitch is the same)
– **Better chip control**: Thread milling produces smaller, more manageable chips
– **Blind hole capability**: You can thread closer to the bottom of a blind hole
– **Better surface finish**: The cutting action often produces a superior thread finish
– **Reduced risk of tap breakage**: No more broken taps stuck in expensive parts
– **Adjustability**: You can easily adjust for thread fit by tweaking cutter compensation
## Why Use a Macro for Thread Milling?
Programming thread milling manually requires you to calculate several variables:
– The thread pitch (lead)
– The major and minor diameters
– The helical arc radius
– Entry and exit moves
– The number of passes
A well-written macro automates all of these calculations. You simply input your known variables — such as thread size, pitch, and depth — and the macro generates the correct toolpath. This is especially useful in job shops where you might be cutting dozens of different thread sizes throughout the week.
### Benefits of a Thread Milling Macro:
1. **Speed**: Program threads in seconds instead of minutes
2. **Consistency**: Every thread is programmed the same way, reducing human error
3. **Flexibility**: Easily modify parameters for different thread sizes
4. **Reduced dependency on CAM**: Program directly at the control when needed
5. **Portability**: Use the same macro across multiple machines
## Key Considerations When Using a Thread Milling Macro
If you’re planning to implement a thread milling macro in your shop, here are some important things to keep in mind:
### 1. Know Your Control
Macro programming (also known as parametric programming) varies between CNC controls. Fanuc-based controls use macro B programming with variables like #1, #2, #3, etc. Other controls like Haas, Mazak, or Siemens have their own syntax. Make sure the macro is compatible with your specific control.
### 2. Climb vs. Conventional Milling
Thread milling can be done using either climb milling or conventional milling. Most macros will give you the option to select which method you prefer. Climb milling is generally preferred for better surface finish and tool life.
### 3. Single-Point vs. Multi-Point Thread Mills
The macro behavior may differ depending on whether you’re using a single-point or multi-point (full-form) thread mill. A single-point cutter requires multiple helical passes, while a full-form cutter can complete the thread in a single helical revolution.
### 4. Right-Hand vs. Left-Hand Threads
Make sure your macro accounts for both right-hand and left-hand thread directions. This typically involves switching between G2 and G3 arcs and reversing the Z-axis direction.
### 5. Test Cuts Are Essential
Even with a proven macro, always run test cuts on scrap material first. Verify the thread with a go/no-go gauge or thread ring/plug gauge before committing to production parts.
## Watch the Full Video
Donnie Hinske walks through the thread milling macro in detail in his video. If you want to see the macro in action and understand how to implement it on your own machine, check it out here:
👉 [Thread Milling Macro for YOU – Watch on YouTube](https://www.youtube.com/watch?v=RJ_FdEUAHIE)
## Practical Tips for Thread Milling Success
Whether you’re using a macro or programming manually, here are some practical tips to ensure your thread milling operations go smoothly:
– **Use proper speeds and feeds**: Thread mills are typically small-diameter tools, so RPM can be high. Consult your tooling manufacturer’s recommendations.
– **Apply coolant effectively**: Thread milling generates heat, especially in deep holes. Through-tool coolant is ideal.
– **Check your tool runout**: Excessive runout will produce inconsistent threads. Keep TIR (Total Indicated Runout) to a minimum.
– **Consider spring passes**: For tight-tolerance threads, a spring pass (repeating the final cut without changing depth) can improve accuracy.
– **Document your macro variables**: Keep a reference sheet near the machine so operators know which variables to change for different thread sizes.
## Final Thoughts
Thread milling macros are one of those shop floor tools that, once you start using them, you’ll wonder how you ever got by without one. They take the complexity out of thread milling programming and allow you to focus on what really matters — making good parts efficiently.
A big thanks to Donnie Hinske for sharing this valuable resource with the CNC community. If you’re looking to level up your thread milling game, this macro is a great place to start.
Have you used thread milling macros in your shop? What challenges have you faced with thread milling? Share your experiences in the comments below!
—
*Did you find this post helpful? Subscribe to stay updated on the latest CNC machining tips, tricks, and techniques that can help you become a more efficient machinist.*
What Should I Do Right Now?
If you’re evaluating new machining processes or equipment, our team can help you determine the best approach for your specific parts, offering guidance, insights, and practical recommendations based on your production needs and goals. Whether you’re optimizing existing workflows or exploring new manufacturing methods, we’re here to support your decision-making.
You Might Also Like
Fixing Titanium Forgings with CNC Machining: Challenges, Techniques & Expert Tips
# Fixing Titanium Forgings: The Art and Science of CNC Machining Titanium forgings are among the most challenging workpieces in the world of CNC machining.…
EATER of Titanium: Watch This CNC Machine Devour Titanium Like Butter
# EATER of Titanium: The CNC Machine That Devours the Toughest Metal There’s something deeply satisfying about watching a CNC machine tear through titanium like…
Crazy Titanium CNC Machining Part – Day 1 | Donnie Hinske’s Epic Build
# Crazy Titanium Part | Day 1: The CNC Machining Journey Begins There’s something deeply satisfying about watching raw titanium transform into a precision-engineered component…