


# The Best Way to Get Burr-Free Hexagons on a Swiss Machine
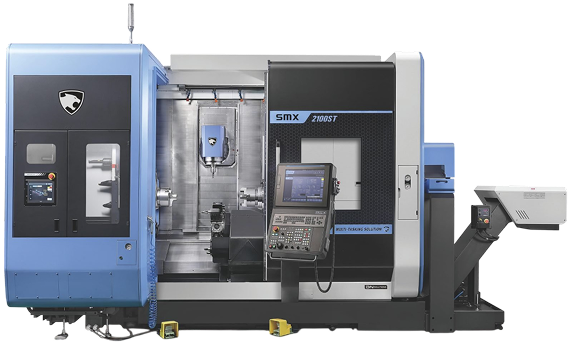
If you’ve ever made fittings on a Swiss-type lathe, you know the drill — there’s almost always a hexagon somewhere on the part. And if you’ve wrestled with burrs on those hex flats, you know how frustrating it can be to get clean, consistent parts run after run. In a recent video, CNC machinist Donnie Hinske walks through his best strategy for producing long-lasting, burr-free hexagonal features on Swiss machines. Let’s break down the approach and the programming logic behind it.
## The Problem: Burrs on Hexagon Flats
Burrs on hexagonal features are one of the most common headaches in Swiss machining. When you’re producing fittings — whether for hydraulic, pneumatic, or plumbing applications — the hex is a critical feature. Customers expect clean edges they can grip with a wrench without any sharp, raised material catching their fingers or interfering with assembly.
The issue typically comes down to the order of operations and how the cutting tools interact with the hex flats. Many machinists fall into habits that actually make the burr problem worse, and Donnie’s video addresses this head-on by outlining what you need to *stop doing* and what to do instead.
## The Strategy: Rethinking Your Order of Operations
The core of Donnie’s approach revolves around carefully planning the sequence of cuts — specifically, how the turning operations relate to the hexagon milling operation. Rather than simply roughing, finishing, and then cutting the hex (or vice versa), the strategy involves a deliberate interleaving of operations designed to ensure that the final cuts leave clean, burr-free edges on the hex flats.
Here’s the high-level breakdown of the strategy as demonstrated in the video:
### 1. Front Turning on the Main Spindle
The program begins with a front-facing and turning operation using Tool 3 (T0303). This operation establishes the basic profile of the part, including chamfers and radii. Donnie uses constant surface speed (G96) with a maximum RPM clamp (G50 S3500) to maintain optimal cutting conditions across varying diameters.
Notice the two-pass approach in the turning section. The first pass is a roughing pass with moderate feeds (F.005–F.008), and the second pass is a finish pass at much finer feeds (F.0015–F.003). This two-pass strategy ensures a clean surface finish before the hex is cut, which is critical for minimizing burr formation later.
### 2. Angled Cuts with Tool 5 (T0505)
The next operation uses Tool 5 to make angled transition cuts. These appear to be the tapered or chamfered transitions leading into and out of the hex area. The Z-position is calculated using bracket expressions (Z[.3+.08+.01]), which makes the program easier to adjust if dimensions change. The feed rate here is extremely fine at F.0015, prioritizing surface quality.
### 3. The Hexagon Milling Operation
This is where it gets interesting. The hex is cut using a live tool (T0606) with the C-axis indexed (M18 C0.) and the Y-axis engaged. Donnie uses macro programming with a WHILE loop to cut all six flats of the hexagon:
“`
#100=.9 (Y START)
#101=-.3 (Y END)
#102=0 (RESET)
WHILE[#102LT6]DO1
G0Y#100H60.
G1G98X.495F25.
Y#101F10.5
G0X.75
#102=#102+1
END1
“`
The H60 command indexes the C-axis by 60 degrees between each flat — exactly what you need for a hexagon (360° ÷ 6 = 60°). The macro variable #102 serves as a counter, iterating through all six flats. The feed switches to F25 (inches per minute via G98) for the plunge and F10.5 for the cutting pass along the Y-axis. This is clean, efficient programming that eliminates repetitive code blocks.
### 4. The Critical Cleanup Passes
Here’s where Donnie’s strategy really differentiates itself. After the hex is milled, the program includes additional passes with Tool 5 and Tool 3 to clean up the transitions between the turned surfaces and the hex flats. These passes specifically target the areas where burrs tend to form — the edges where the round turned diameter meets the flat hex surfaces.
The T0505 pass revisits the angled transition with a slightly adjusted Z-position (adding .0014 to the original offset), and the T0303 pass makes a light finish cut on the taper leading into the hex. By making these cuts *after* the hex is milled, any burr that was raised during the milling operation gets cleanly removed by the turning tool.
### 5. Sub Spindle Operations
The back end of the part is handled on the sub spindle with a facing and chamfering operation. Tool 31 (T3100) faces the back of the part and adds a chamfer and a short turned section. The same attention to feed rates and finish quality is applied here, with the finish pass running at F.0015.
## Key Takeaways for Burr-Free Hex Parts
**Stop finishing before you mill the hex.** If your final turning passes happen before the hex is cut, the milling operation will raise burrs on those beautifully finished edges. Instead, rough turn, mill the hex, and then make your finish turning passes to clean everything up.
**Use macro programming for the hex.** A WHILE loop with a counter and C-axis indexing is far cleaner than writing six separate blocks for each flat. It’s easier to edit, easier to debug, and less prone to errors.
**Pay attention to feed rates at transitions.** The areas where turned surfaces meet hex flats are burr-prone zones. Donnie uses very fine feeds (F.0015 and below) in these critical areas to minimize material displacement.
**Take light cleanup passes after milling.** A few thousandths of material removed by a turning tool after the hex is milled can make the difference between a part that needs deburring and one that comes off the machine ready to ship.
## Why This Matters for Production
In a production environment, deburring is time and money. If you’re running thousands of fittings and every single one needs hand deburring on the hex flats, you’re adding significant labor cost to each part. A strategy that eliminates or dramatically reduces burrs at the machine means faster throughput, lower costs, and happier customers.
Donnie’s approach is a great example of how thoughtful programming and process planning on a Swiss machine can solve problems that many shops just accept as inevitable. The hex burr problem isn’t something you have to live with — it’s something you can engineer your way out of.
For more information on Swiss machining strategies and CNC programming tips, you can reach out to Dynamic Machine of Detroit at [dynamicmachine.com](https://www.dynamicmachine.com) or watch the full video walkthrough on [Donnie Hinske’s YouTube channel](https://www.youtube.com/watch?v=oqQmS6t6TXo).
What Should I Do Right Now?
If you’re evaluating new machining processes or equipment, our team can help you determine the best approach for your specific parts, offering guidance, insights, and practical recommendations based on your production needs and goals. Whether you’re optimizing existing workflows or exploring new manufacturing methods, we’re here to support your decision-making.
You Might Also Like

Fixing Titanium Forgings with CNC Machining: Challenges, Techniques & Expert Tips
# Fixing Titanium Forgings: The Art and Science of CNC Machining Titanium forgings are among the most challenging workpieces in the world of CNC machining.…

EATER of Titanium: Watch This CNC Machine Devour Titanium Like Butter
# EATER of Titanium: The CNC Machine That Devours the Toughest Metal There’s something deeply satisfying about watching a CNC machine tear through titanium like…

Crazy Titanium CNC Machining Part – Day 1 | Donnie Hinske’s Epic Build
# Crazy Titanium Part | Day 1: The CNC Machining Journey Begins There’s something deeply satisfying about watching raw titanium transform into a precision-engineered component…